

ESP32, ESP8266 & Raspberry Pi, lesson 21 of 26
How to make an ESP32 Web Server?
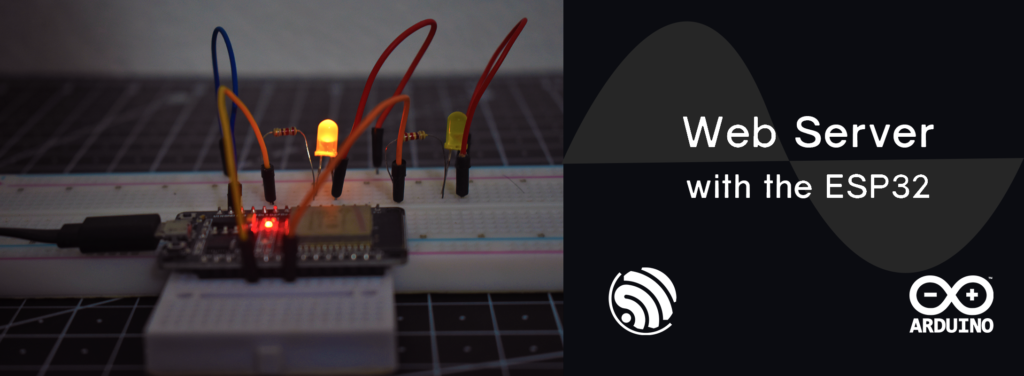
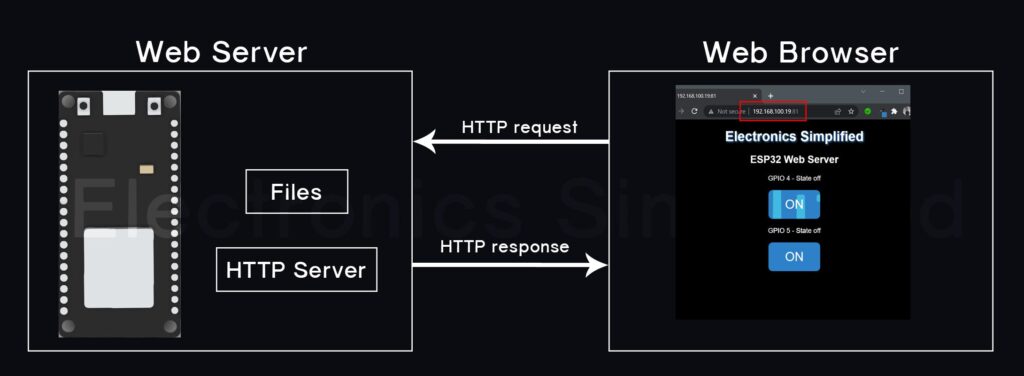
Web Server is a computer software with underlying hardware that accepts requests from HTTP. We are going to build a web server with the ESP32 that will be able to control two simple LEDs. The same LEDs can be replaced with any digital control device for example a relay. The Web server will be accessible only on your local network. We will learn about the IoT controls soon.
Introduction
We try to think how wireless devices function. How we can control various devices from any part of the world and so many other questions pop up as we walk in to the modern day technology. Let us take a step ahead in this journey and begin to control 2 small LEDs with the help of your internet browser.
All great things start small. So lets move ahead and understand the underlying concepts. Happy Learning!
Prerequisite
ESP32 - Web Server Project
The ESP32 can successfully communicate with other devices on the network, and if your local network is online (if it is connected to the Internet via your modem), the ESP32 can also communicate with any device on the web!
Components required
- ESP32
- LED x 2
- 220Ω Resistor x 2
- Breadboard
- Jumper Wires
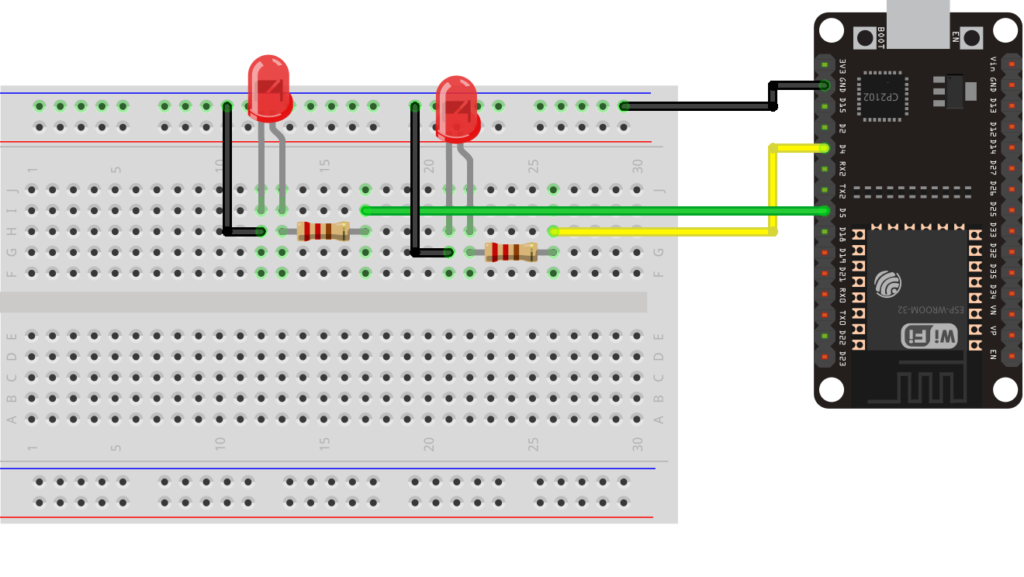
Circuit Diagram
We are going to connect the circuit and then upload the code. In most cases when you master the ESP32, the best practice would be connecting the circuit after uploading the code. (unless you are working on development purposes)
Working
- The ESP32 will establish the local connection with your router. (For this you will have to enter your WiFi Name and Password into the below Code).
- The ESP32 will now be able to communicate with any device on the local network and vice versa.
- So connect another device to your network (phone/tablet/computer/laptop), then open a web browser and type the IP address that is displayed on the Serial Monitor along with the port number. example (IP : 192.168.31.82 then type on the web browser with the port number 81 after a colon as shown in image 3 ---> 192.168.31.82:81)
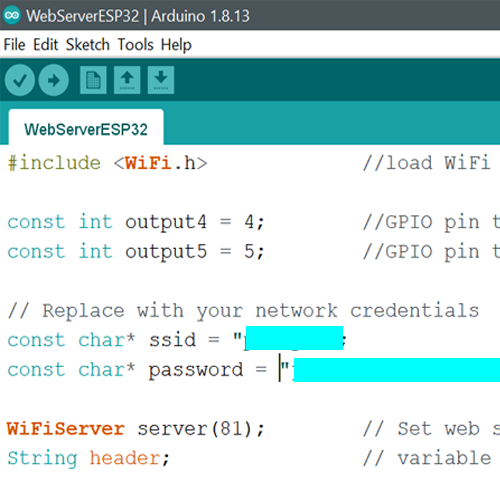 1.Add your network credentials
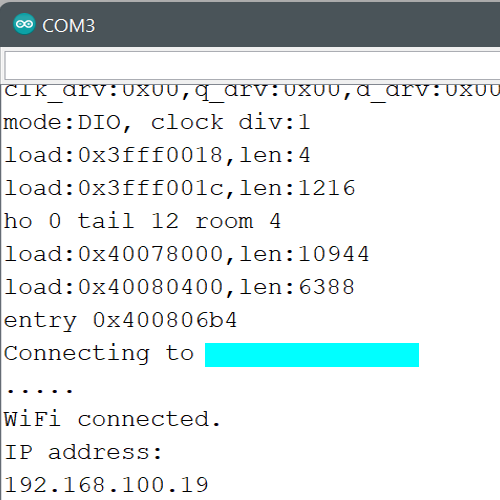 2.Connection Established
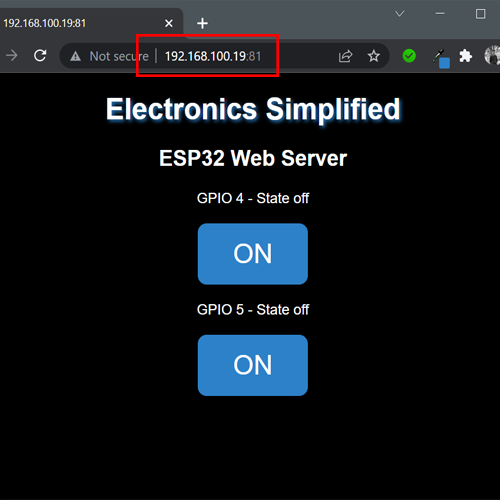 3.Browser Page
Code
/*Read more at electronicssimpliifed.in
This programs illustrates the use of web server using the ESP32*/

#include <WiFi.h>             //load WiFi Library

const int output4 = 4;        //GPIO pin to control our LED1
const int output5 = 5;        //GPIO pin to control our LED2

// Replace with your network credentials
const char* ssid = "Your Wifi Name";
const char* password = "Wifi Password";

WiFiServer server(81);        // Set web server port number to 81
String header;                // variable for http storage

String output4State = "off";  // variables to store the pin status
String output5State = "off";

// Current time
unsigned long currentTime = millis();
// Previous time
unsigned long previousTime = 0;
// Define timeout time in milliseconds (example: 2000ms = 2s)
const long timeoutTime = 2000;

void setup() {
  Serial.begin(115200);
  // Initialize the output variables as outputs
  pinMode(output4, OUTPUT);
  pinMode(output5, OUTPUT);
  // Set outputs to LOW
  digitalWrite(output4, LOW);
  digitalWrite(output5, LOW);

  // Connect to Wi-Fi network with SSID and password
  Serial.print("Connecting to ");
  Serial.println(ssid);
  WiFi.begin(ssid, password);
  while (WiFi.status() != WL_CONNECTED) {
    delay(500);
    Serial.print(".");
  }
  // Print local IP address and start web server
  Serial.println("");
  Serial.println("WiFi connected.");
  Serial.println("IP address: ");
  Serial.println(WiFi.localIP());
  server.begin();
}

void loop(){
  WiFiClient client = server.available();   // Listen for incoming clients

  if (client) {                             // If a new client connects,
    currentTime = millis();
    previousTime = currentTime;
    Serial.println("New Client.");          // print a message out in the serial port
    String currentLine = "";                // make a String to hold incoming data from the client
    while (client.connected() && currentTime - previousTime <= timeoutTime) {  // loop while the client's connected
      currentTime = millis();
      if (client.available()) {             // if there's bytes to read from the client,
        char c = client.read();             // read a byte, then
        Serial.write(c);                    // print it out the serial monitor
        header += c;
        if (c == '\n') {                    // if the byte is a newline character
          // if the current line is blank, you got two newline characters in a row.
          // that's the end of the client HTTP request, so send a response:
          if (currentLine.length() == 0) {
            // HTTP headers always start with a response code (e.g. HTTP/1.1 200 OK)
            // and a content-type so the client knows what's coming, then a blank line:
            client.println("HTTP/1.1 200 OK");
            client.println("Content-type:text/html");
            client.println("Connection: close");
            client.println();

            // turns the GPIOs on and off
            if (header.indexOf("GET /4/on") >= 0) {
              Serial.println("GPIO 4 on");
              output4State = "on";
              digitalWrite(output4, HIGH);
            } else if (header.indexOf("GET /4/off") >= 0) {
              Serial.println("GPIO 4 off");
              output4State = "off";
              digitalWrite(output4, LOW);
            } else if (header.indexOf("GET /5/on") >= 0) {
              Serial.println("GPIO 5 on");
              output5State = "on";
              digitalWrite(output5, HIGH);
            } else if (header.indexOf("GET /5/off") >= 0) {
              Serial.println("GPIO 5 off");
              output5State = "off";
              digitalWrite(output5, LOW);
            }

            // Display the HTML web page
            client.println("<!DOCTYPE html><html>");
            client.println("<head><meta name=\"viewport\" content=\"width=device-width, initial-scale=1\">");
            client.println("<link rel=\"icon\" href=\"data:,\">");
            // CSS to style the on/off buttons
            // Feel free to change the background-color and font-size attributes to fit your preferences
            client.println("<style>html { font-family: arial; display: inline-block; margin: 0px auto;color:white; text-align: center;background-color: #000000;}");
            client.println(".button { background-color: #2d81c8; border: none; color: white; padding: 16px 40px;border-radius:10px;");
            client.println("text-decoration: none; font-size: 30px; margin: 2px; cursor: pointer;}");
            client.println(".button2 {background-color: #555555;border-radius:10px;}");
            client.println("h1 {text-shadow: 2px 2px 4px #2d81c8;}");
            client.println(".state {color:white;}</style></head>");


            // Web Page Heading
            client.println("<body><h1>Electronics Simplified</h1>");
            client.println("<h2>ESP32 Web Server</h2>");

            // Display current state, and ON/OFF buttons for GPIO 4
            client.println("<p class=\"state\">GPIO 4 - State " + output4State + "</p>");
            // If the output4State is off, it displays the ON button       Ṁ
            if (output4State=="off") {
              client.println("<p><a href=\"/4/on\"><button class=\"button\">ON</button></a></p>");
            } else {
              client.println("<p><a href=\"/4/off\"><button class=\"button button2\">OFF</button></a></p>");
            }

            // Display current state, and ON/OFF buttons for GPIO 5
            client.println("<p>GPIO 5 - State " + output5State + "</p>");
            // If the output5State is off, it displays the ON button
            if (output5State=="off") {
              client.println("<p><a href=\"/5/on\"><button class=\"button\">ON</button></a></p>");
            } else {
              client.println("<p><a href=\"/5/off\"><button class=\"button button2\">OFF</button></a></p>");
            }
            client.println("</body></html>");

            // The HTTP response ends with another blank line
            client.println();
            // Break out of the while loop
            break;
          } else { // if you got a newline, then clear currentLine
            currentLine = "";
          }
        } else if (c != '\r') {  // if you got anything else but a carriage return character,
          currentLine += c;      // add it to the end of the currentLine
        }
      }
    }
    // Clear the header variable
    header = "";
    // Close the connection
    client.stop();
    Serial.println("Client disconnected.");
    Serial.println("");
  }
}
Conclusion
The ESP32 has successfully established connection with the local router and then now can connect to any device on this network. Enjoy the Tutorial!